
In various ways, Mark and I have each faced minor challenges this week. Mine was costuming for my job at the Noble House and Mark’s is the bathroom floor.
This year at the Noble House, our exhibit is Victorian weddings. Problem is, the only clothes I have that look anything like the period are mostly the black clothes I had for the Victorian funerals exhibit last year, and that is not appropriate for this exhibit. I told my boss I needed some new costumes, so she brought me three outfits on Tuesday, all of which had problems. There was a dress that was so long, it laid four inches on the ground around my feet. There was a skirt that was so wide it fell off me when I fastened it. Another skirt was a little large on me but doable. However, it looked kind of drab and modern. I brought the clothes home to see what I could do with them. I spent all day Wednesday sewing and was very pleased with what I had accomplished.
On the extra long dress, I made a couple of two-inch tucks in layers above the hemline which was a popular style back in the day. On the skirt that fell off me, I made tucks around the back waistband until it fit me. The drab skirt received the most dramatic change and I had the most fun creating a new look for it. My boss had given me a long-sleeved white blouse that was a bit too large for me. It didn’t look right tucked into the skirt and it was too long and looked too big if I left it untucked. I looked in my fabric stash and found some fabric that might go with the skirt. I made a sash, but then I thought, “I could add some sort of decoration to that to make it look even better. Out of the same fabric as the sash, I made a sort of flower. I backed it with lace and sewed a button through the center of the flower and the lace, then attached it to the sash. To brighten the skirt and make it look a bit more period, I put more of the same lace around the hem. Here is my solution to the problem:

I have an amethyst necklace that goes well with the other colors, and I topped it all off with a white shawl I already own.
Mark’s problem is how to lay the new bathroom floor around the toilet drain which has a lip around the top. It was obviously put into the old floor after the floor was already down. There is also a new heating vent to be worked around, but that is only going to be a matter of cutting the hole for it and laying the flooring down over it. Here is Mark’s solution to the problem:
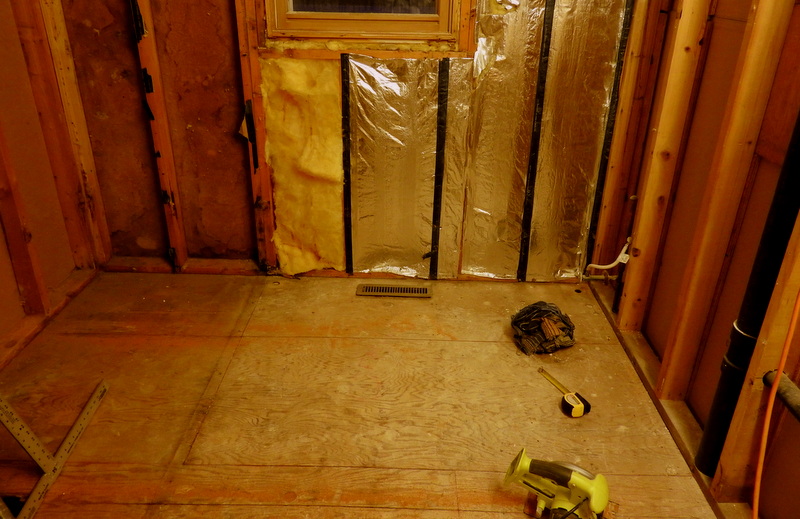
Mark cut through the original sub-floor in several places to make it easier to get out.
If you look closely at the picture, the wadded up towel in the right corner is covering the toilet drain to try to prevent debris from falling in and the odor from wafting out. Across that point in the floor, halfway through the drain hole, Mark cut a line so that he can take the board out on either side of it. When he puts the new flooring in, he will also put that in in halves with a half circle cut out to go around the drain. The heat register is just beyond the toilet drain. In the foreground under Mark’s power saw, there are two cuts. the one that’s closer to the toilet drain was the seam on the original flooring, but the cut in front of that is at four feet. The floor panels we got are four feet wide, so that’s where the new panel will fit in. Mark’s weekend is Sunday and Monday and he plans to work on the bathroom more then. He’s hoping to have the flooring done by the end of Monday. I’m excited about moving into the reconstruction phase of this remodel!